- USDT(TRC-20)
- $0.0
Until now, Windows has always offered better split-screen multitasking and window management features than Mac. Sure, it's right there in the name, but Window's Snap assistant offered perhaps the most intuitive way to split and manage multiple windows on the same screen. Mac tried with Stage Manager, but it's not the same thing.
Now, with macOS Sequoia (currently available as a Developer beta), Apple is finally offering its own take on window snapping, and it's quite similar to what Windows offers, albeit lighter. Let's get into it.
Before we start, let's install the macOS Sequoia beta. I recommend using a backup device for this if possible, as using a beta risks instability. Start by backing up your Mac. Then open System Settings, navigate to General > Software Update and click Beta updates. Select the latest macOS Sequoia developer beta, then follow the instructions to install it.

Credit: Khamosh Pathak
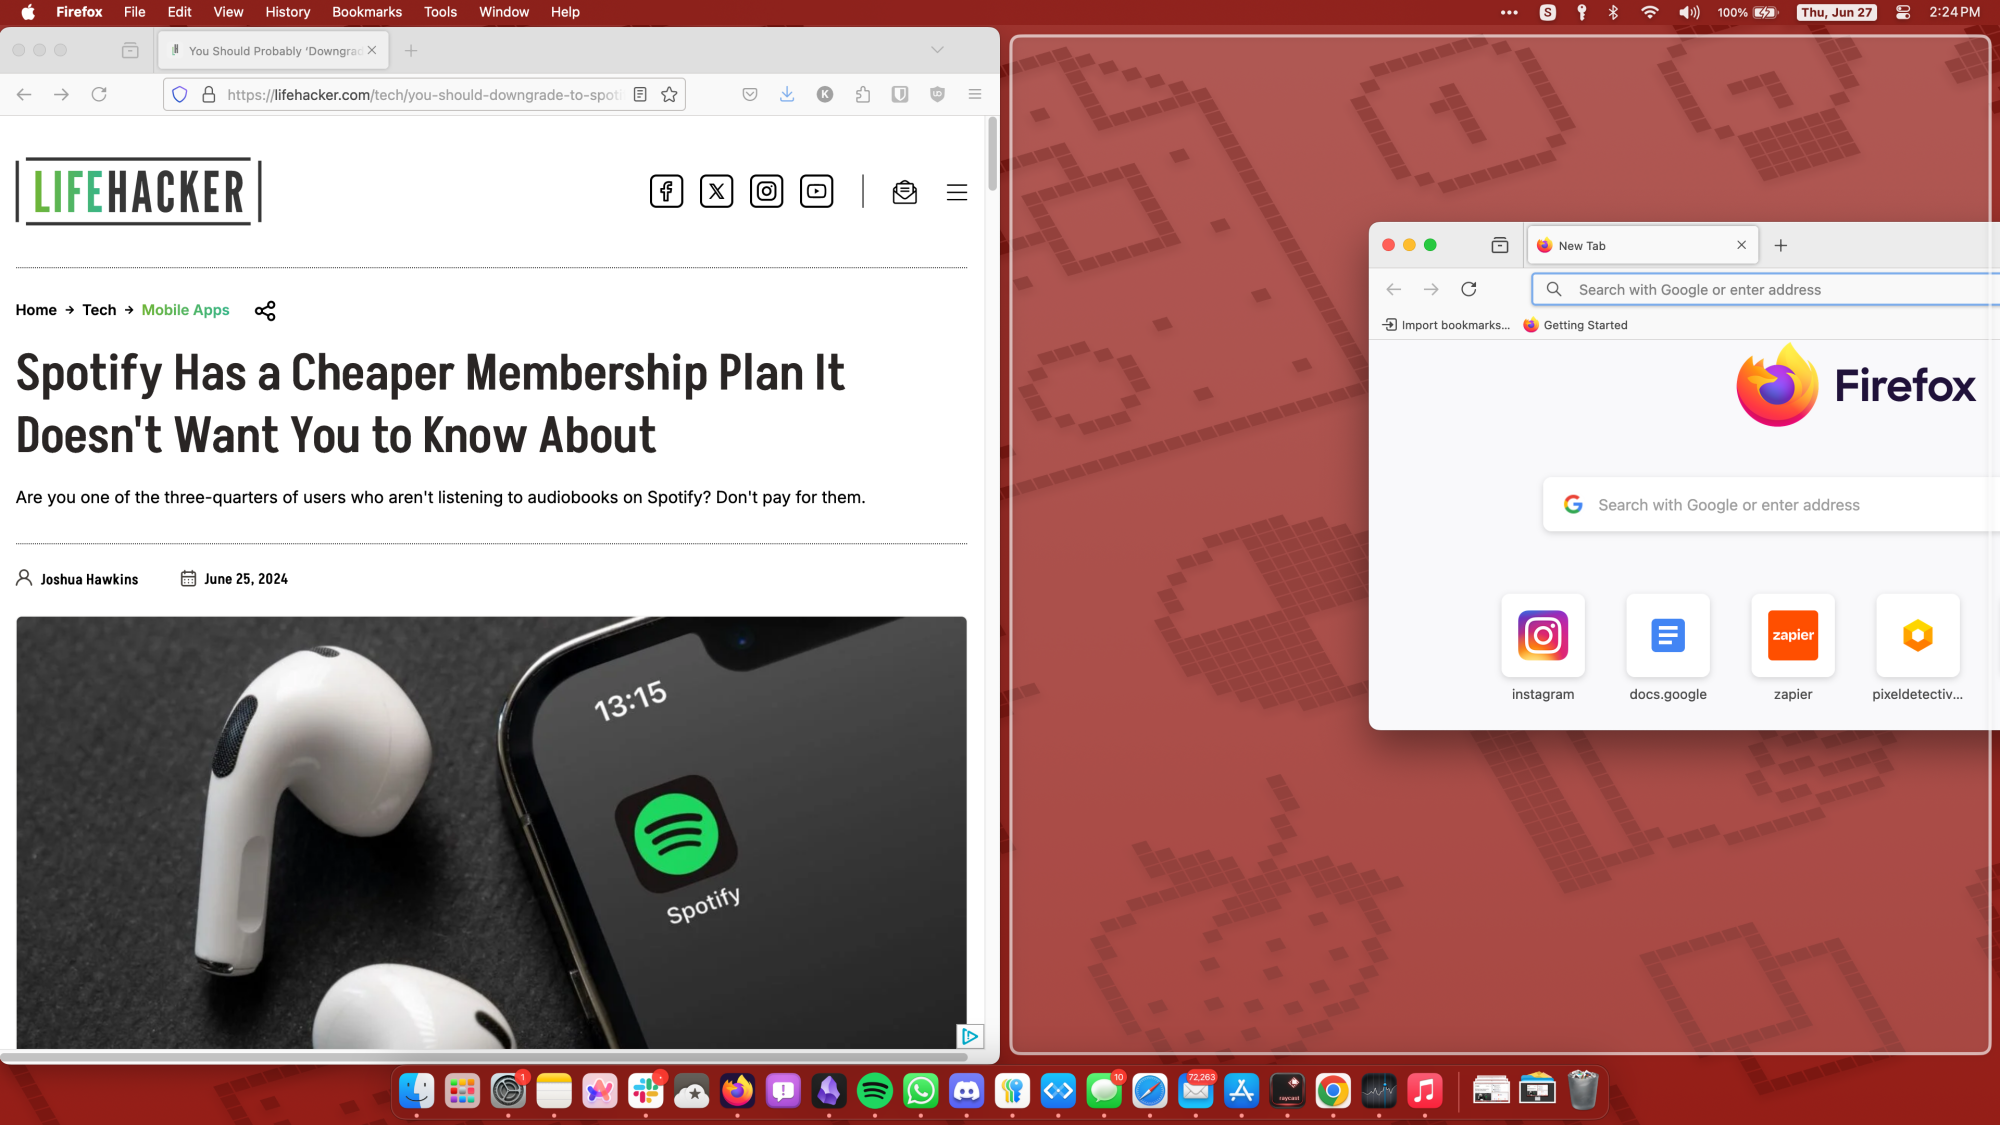
macOS Sequoia supports tiling windows using a mouse gesture. When you drag a window to any edge of your screen, you'll notice a white outline. Release the cursor and the window will snap to fill out the outline. You can speed up this process by holding the Option key when you're moving the window, which will highlight the screen's left or right panel without you needing to move your mouse to the edge of your desktop.
Once you've snapped a window, you'll notice that macOS puts a little border around it, even if a window is covering the whole screen. This is one of those weird Apple design touches, but it can be disabled. Go to System Settings > Desktop and Dock > Windows and disable the Tiled windows have margin feature.

Credit: Khamosh Pathak
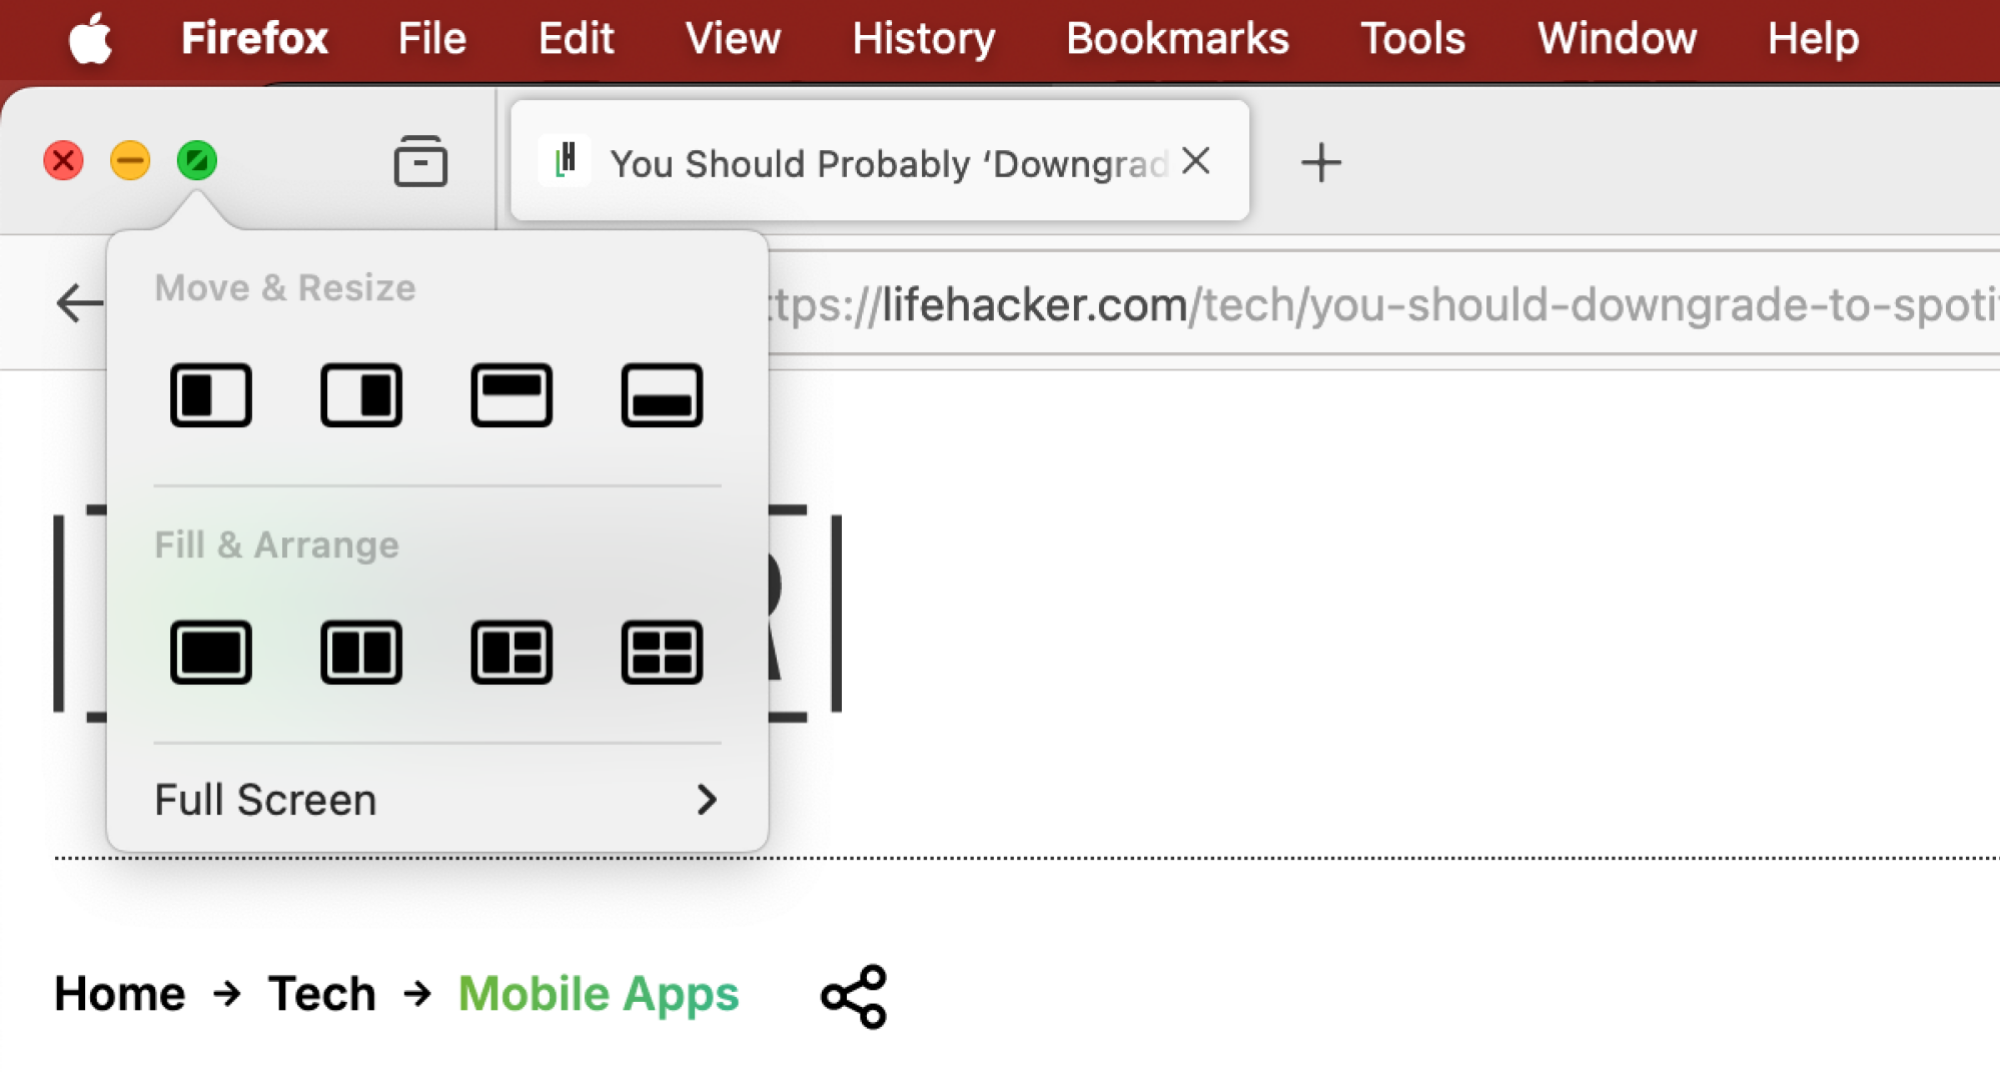
If you don't like dragging your mouse cursor all over the screen, macOS Sequoia also has an option to automatically arrange all open windows (or at least the most recent ones), using a layout of your choice. Hover over the green stoplight icon in the top left of any window to see new arrangement options. You can either move the current window to a specific section of the screen, or you can choose one of the four Fill & Arrange options to automate the process.
Click one of the options and macOS will automatically take your foreground windows and arrange them in that pattern. This, sadly, is all it can do. Unlike Windows, the grid stops at four apps on screen, and there are no layout options for 6 apps. Plus, the process is automatic. Windows will show you all other apps that are available to place on the grid, and you can choose which window can go where. This feature isn't available on macOS, and I hope it gets added in a future update.
If you find these features limiting, check out third-party options like Loop, which give you a lot more freedom over how exactly windows can be tiled and arranged on screen.
The old method of split-screen multitasking, which opens both windows full screen and in a new Desktop, also still exists. It now lives in the Full Screen section in the green stoplight menu.
Keyboard shortcuts offer a great option for arranging windows in neat halves and sections. Most of the time, you're going to be splitting the screen into two anyway. With macOS Sequoia, you can use the keyboard shortcuts Globe + Control + Left to dock the window to the left, or Globe + Control + Right to put it over to the right.
You can also use keyboard shortcuts to automatically arrange two windows. Use Globe + Control + Shift + Left to dock the current window to the left, and the next available window to the right. You can flip the order by using the Right key in the same keyboard shortcut. This also works with the Up and Down keyboard combination. To see all available keyboard shortcuts, go to Window > Move & Resize from the menu bar.
Full story here:
Now, with macOS Sequoia (currently available as a Developer beta), Apple is finally offering its own take on window snapping, and it's quite similar to what Windows offers, albeit lighter. Let's get into it.
Installing the macOS Sequoia Beta
Before we start, let's install the macOS Sequoia beta. I recommend using a backup device for this if possible, as using a beta risks instability. Start by backing up your Mac. Then open System Settings, navigate to General > Software Update and click Beta updates. Select the latest macOS Sequoia developer beta, then follow the instructions to install it.
Tiling windows on macOS using mouse gestures

Credit: Khamosh Pathak
macOS Sequoia supports tiling windows using a mouse gesture. When you drag a window to any edge of your screen, you'll notice a white outline. Release the cursor and the window will snap to fill out the outline. You can speed up this process by holding the Option key when you're moving the window, which will highlight the screen's left or right panel without you needing to move your mouse to the edge of your desktop.
Once you've snapped a window, you'll notice that macOS puts a little border around it, even if a window is covering the whole screen. This is one of those weird Apple design touches, but it can be disabled. Go to System Settings > Desktop and Dock > Windows and disable the Tiled windows have margin feature.
Automatically arrange windows on macOS

Credit: Khamosh Pathak
If you don't like dragging your mouse cursor all over the screen, macOS Sequoia also has an option to automatically arrange all open windows (or at least the most recent ones), using a layout of your choice. Hover over the green stoplight icon in the top left of any window to see new arrangement options. You can either move the current window to a specific section of the screen, or you can choose one of the four Fill & Arrange options to automate the process.
Click one of the options and macOS will automatically take your foreground windows and arrange them in that pattern. This, sadly, is all it can do. Unlike Windows, the grid stops at four apps on screen, and there are no layout options for 6 apps. Plus, the process is automatic. Windows will show you all other apps that are available to place on the grid, and you can choose which window can go where. This feature isn't available on macOS, and I hope it gets added in a future update.
If you find these features limiting, check out third-party options like Loop, which give you a lot more freedom over how exactly windows can be tiled and arranged on screen.
The old method of split-screen multitasking, which opens both windows full screen and in a new Desktop, also still exists. It now lives in the Full Screen section in the green stoplight menu.
Snapping windows using keyboard shortcuts
Keyboard shortcuts offer a great option for arranging windows in neat halves and sections. Most of the time, you're going to be splitting the screen into two anyway. With macOS Sequoia, you can use the keyboard shortcuts Globe + Control + Left to dock the window to the left, or Globe + Control + Right to put it over to the right.
You can also use keyboard shortcuts to automatically arrange two windows. Use Globe + Control + Shift + Left to dock the current window to the left, and the next available window to the right. You can flip the order by using the Right key in the same keyboard shortcut. This also works with the Up and Down keyboard combination. To see all available keyboard shortcuts, go to Window > Move & Resize from the menu bar.
Full story here:


